10 Powerful Yoga Poses to Get a Flat Stomach
Everyone has their own idea of what a strong core is. Though six-packs are nice to look at, true core strength comes from working the inner abdominal wall – the transverse abdominis and erector spinae – that creates a girdle of support in the torso.
Knowing how to engage these muscles is the first chore. Thankfully, the mindfulness and breathing practices present in yoga can not only help you connect to your body, you can also tone your abs.
Before starting any of these asanas, or poses, take a moment to warm up your body with some cleansing pranayama (breath work). Lay supine on your back, heels in line with your ischial tuberosities – your sitz bones – and knees bent to face the sky. In this position, find pelvic neutral.
Pelvic neutral is where your tailbone is neither tipped forward nor back, so there is a natural curve of the spine, your shoulder blades are flat against the earth, and your neck is long. Begin to engage the core by imagining either sides getting corseted together.
The pelvic floor pulls up towards the belly button as the belly button sinks towards the spine. Your ribcage should feel as if it is connected to your hip sockets. Hold for a moment then release with a deep exhale. Repeat several times to warm up the core.
Learning how to control these deep abdominal muscles is key to straightening your posture and working the core. Now, use that same ‘zipping up’ sensation during these ten yoga poses for flatter abs:
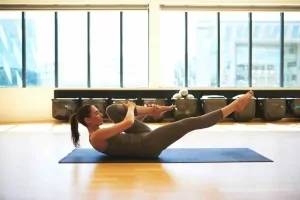
1 Boat Pose
A favorite of yogis everywhere for working the transverse abdominis. Boat pose has a multitude of variations to suit your core and hip strength. Work through the various levels to find which one works best for you.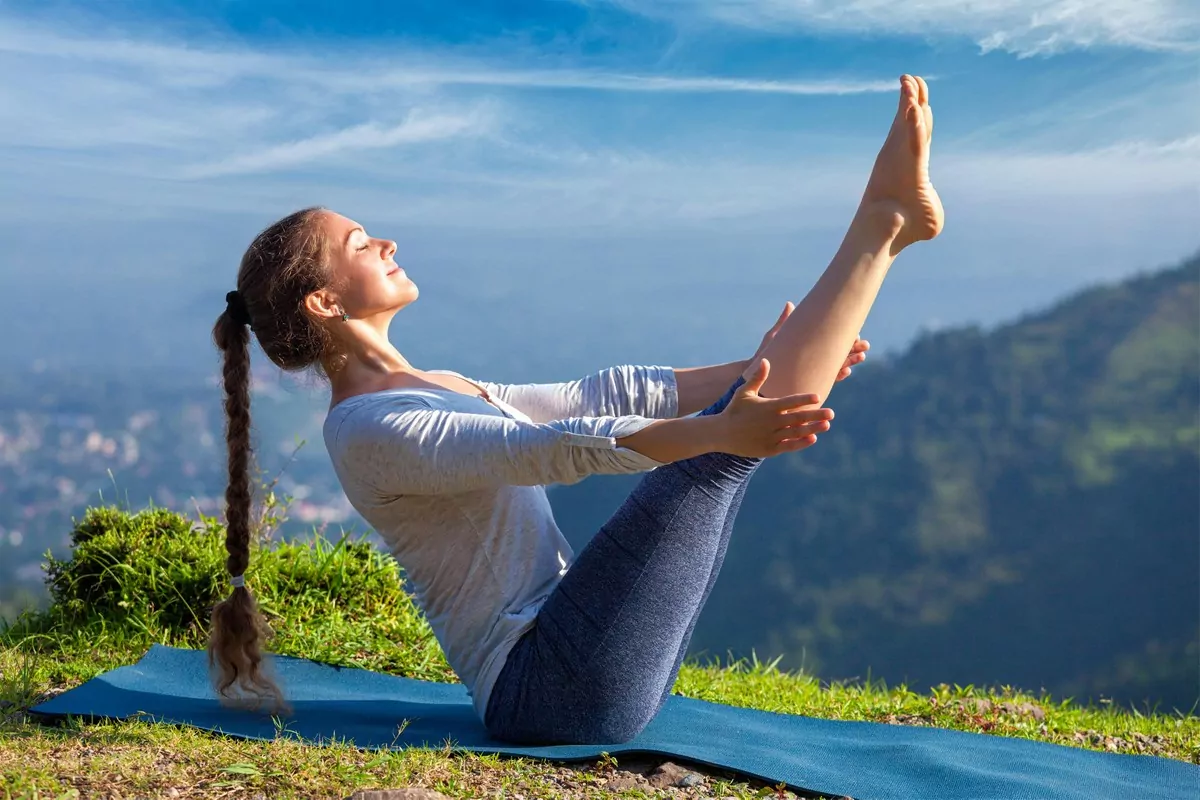
To get into Boat Pose, begin seated on the ground, knees drawn up towards the chest. Again, the heels should be in line with the sitz bones. The spine is long, and your cranium floats above it. Take your hands behind the thighs.
Never clasp ahold of the region right behind the knee, as the area is very sensitive and prone of injury if too much pressure is applied. As you inhale, begin to tip back onto the coccyx. Engage the core, trying to guide the quadriceps and ribcage into a V position.
The modified version is holding onto your legs while keeping the knees bent and working the spine. Lengthen a bit further, stretching the legs away from you while staying balanced on the sacrum region. If you feel you can release the legs, let the go. Reach the fingers for your toes and note how shooting energy through these regions helps keep the core strong and the breath even.
Hold your boat pose for 20-30 seconds. Gather yourself then repeat 2-3 times.
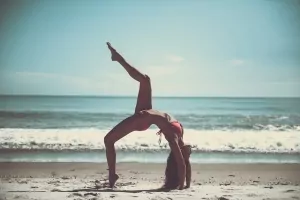
2 Bow Pose
Similar to Locust Pose with what muscle groups are worked, Bow Pose is a true back bend that feels terrific. There is also an added stretch of the shoulders when clasping ahold of the ankles. Begin prone, as you had with Locust Pose.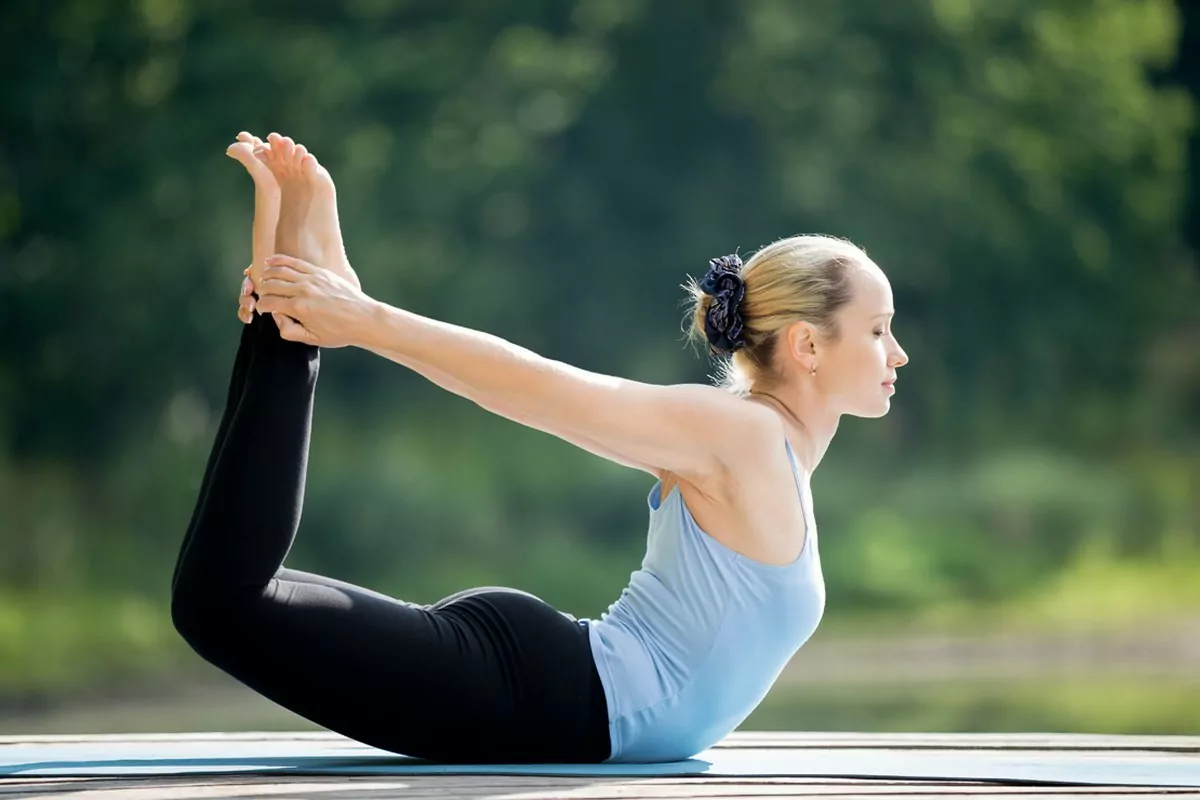
First guide the heels towards your backside. Reach back with the arms, taking ahold of the feet in a comfortable way. The work now comes from the thighs peeling off the floor and feet rising up. Inhale, raise the chest, cinch the core tight, and squeeze the glute muscles to get extra height.
Breathe in that position you reach for a few cycles of breath, allowing the body to rock, before releasing with an exhale. Repeat 2-3 times each day to get a flatter stomach.
Modifications include keeping the head and chest down, only lifting the legs and grabbing hold of the feet or ankles. Alternatively, you can lift one leg at a time. Pointing and flexing the feet also give a different stretch. Feel free to play around in your Bow Pose.
3 Locust Pose
This pose does not necessarily target the front abdominal wall, but it does strengthen the back, which helps ‘cinch’ the waist by adding in stronger postural muscles. After all, standing straight and proper is the easiest way to flatten your core.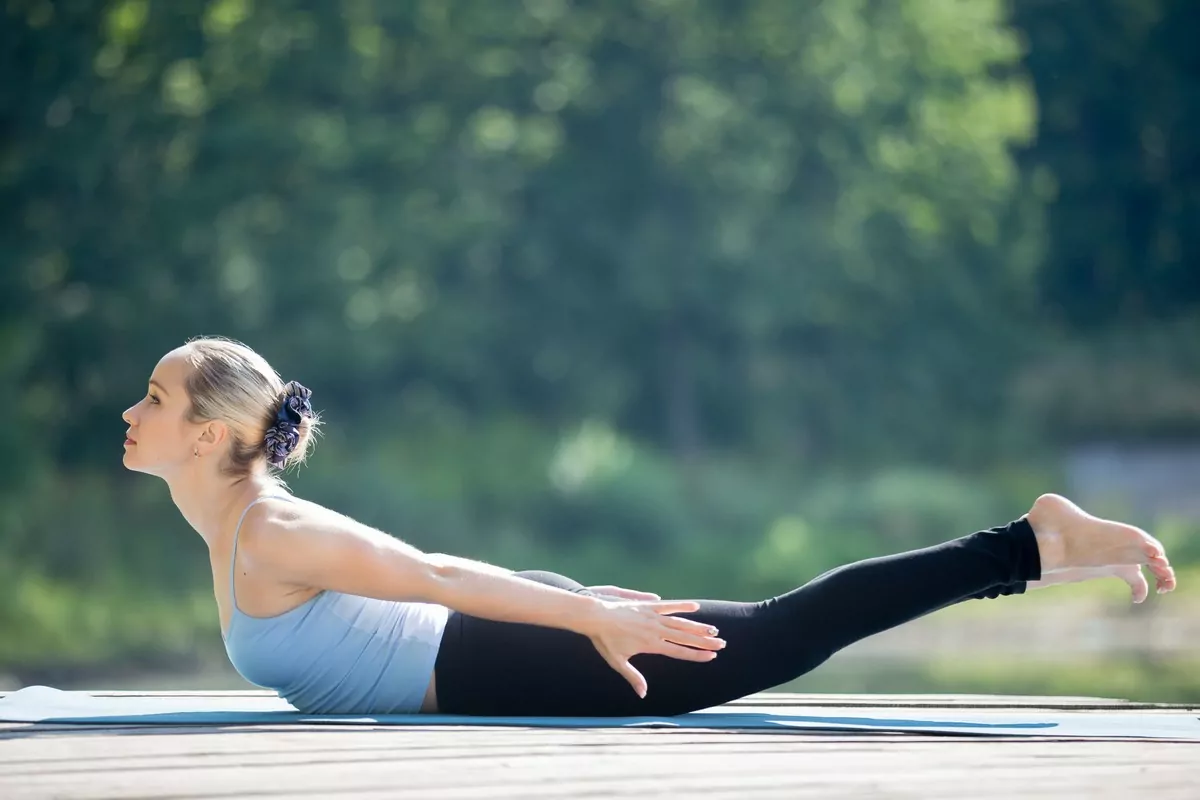
Lay prone on the mat. Arms are at your sides. Stay aware of the shoulders throughout this pose. You do not want them creeping up towards your earlobes and shortening the neck. Also be aware that Locust pose does put strain on the neck, so if you have an injury or a stiff neck, avoid lifting your chin and keep your focus down but slightly in head of you.
Drawing the pelvic floor upwards, guide your belly button towards the tailbone. Energize your entire body with a vigorous inhale then simultaneously lift the toes, thighs, ribs and chest away from the floor.
Keep the arms powerfully reaching for your toes. Feel the connection of your core as you lower with the exhale. Repeat several times, using the inhalation to lift and the exhale to lower.
4 Downward Facing Dog with Knee-Pulls
People often wonder how to get a more dynamic inverted V shape in downward dog. My answer is this: use the core. Downward Facing Dog does not merely stretch the back body and hamstrings, it puts you in a position to learn how to connect to your transverse abdominis.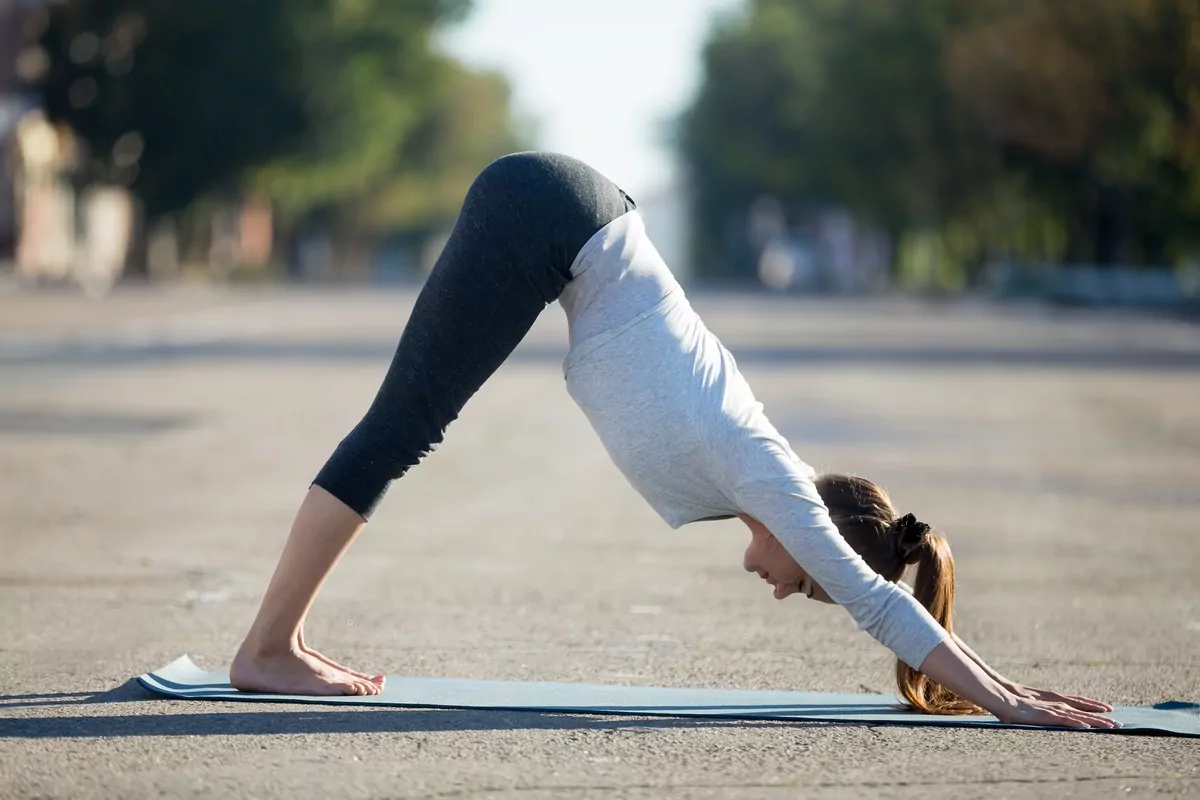
As you lift from the tailbone to get the heels to the floor, keep the hands lightly pressing into the mat and the shoulders rolling back into the spine for length. In full Downward Dog, think about your abs hugging your spine and pulling towards the tailbone with the inhale. Upon exhaling, release the hold on your abs.
You will need this pattern when performing the knee-pull. Maintaining your Downward Dog pose, lift one leg up into the sky. Toes can be pointed or flexed, depending on what feels best for you. As you exhale, (ice cream) scoop in the abdominals, feel a head to tail connection, and guide the knee of the lifted leg towards your nose. Powerfully extend back to the three-legged Down Dog position with the breath. Switch sides. Repeat 10-12 times.
Read also – 10 Yoga Poses That Improve Your Metabolism
5 Warrior III Pose
Come to standing at the top of the mat with the feet slightly apart. Find a position where the body is as aligned as it was laying supine on the floor. Corset up the core muscles then step back with the right foot, turning those toes out at a 45-degree angle.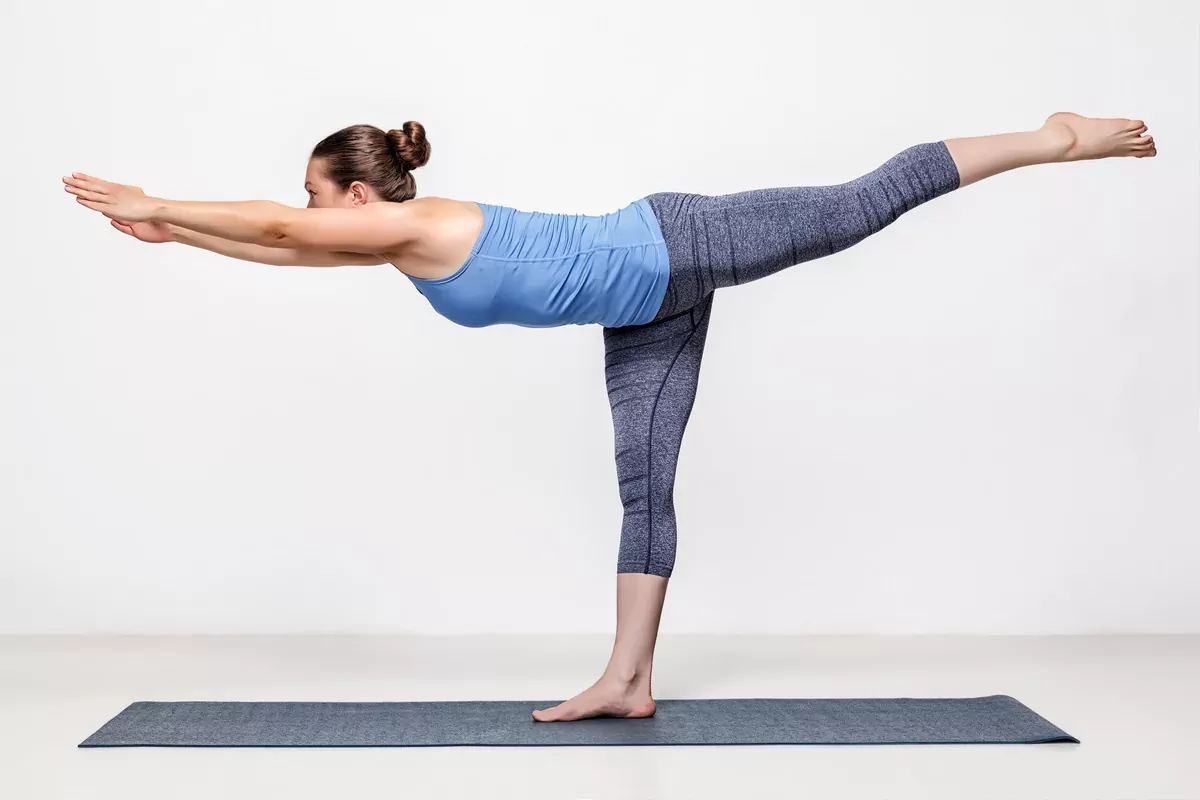
Bend deep into the left knee. This is foundational Warrior I. Lift the arms from the shoulders but keep the shoulder blades relaxed. From here shift the weight of your body forward, over the left leg. Inhale, lift the rear leg, and float gently into this balance posture.
Use your core to keep stability over the supporting leg. To lower, gently set the right back into Warrior I position. Step back to the start point to switch sides if desired. Keep the kneecap of the supporting leg engaged, but be aware of hyperextension.
6 Twisted Triangle Pose
From the same standing position from Warrior III, step back with the right leg, placing the foot at 45-degree angle. Keep the left leg straight (only a micro-bend in the knee). Allow the hips and torso to face the right side. Lift the arms.
Engage the core, stretch the spine, and shoot energy from the crown of the head as you shift from the hips, sending them towards the rear leg. Do not move laterally and allow the ribcage to fall out of alignment with the pelvis.
From Triangle Pose, twist the core around the face the left side, grounding with the right hand outside of the left foot. You need a strong core to unwind and return to the start of Triangle Pose. Hold the twist for a few breaths. Switch to the left was unwound and back to the standing pose.
7 Staff Pose to Flying Cross-Legged Pose
My favorite one. Sitting on the floor, legs extending, spine long, you will find yourself already in Dandasana/Staff Pose. Imagine that you are sitting against a wall to keep the spine long and core working to keep this posture. Use the muscles in the legs to extend and invigorate them with energy. Flex the feet.
Your hands are supportive, slightly back behind you with the fingertips pointing vaguely towards the kidneys. From here, shift backwards a little to create space as the legs move into a cross-legged position. Draw the knees close to the chest, using the core to do so. Try to keep them lifted as you uncross the legs and lower them back down to the ground and back to Staff Pose.
Read also – 7 Ways to Lose Belly Fat and Sculpt Your Abs
8 Upward Facing Plank Pose
This is an easy pose to get into, but the work is astoundingly intense. From sitting Staff Pose, use the back body – glutes, hamstrings, and triceps – to aid in raising the hips up from the floor. Keep the neck at neutral.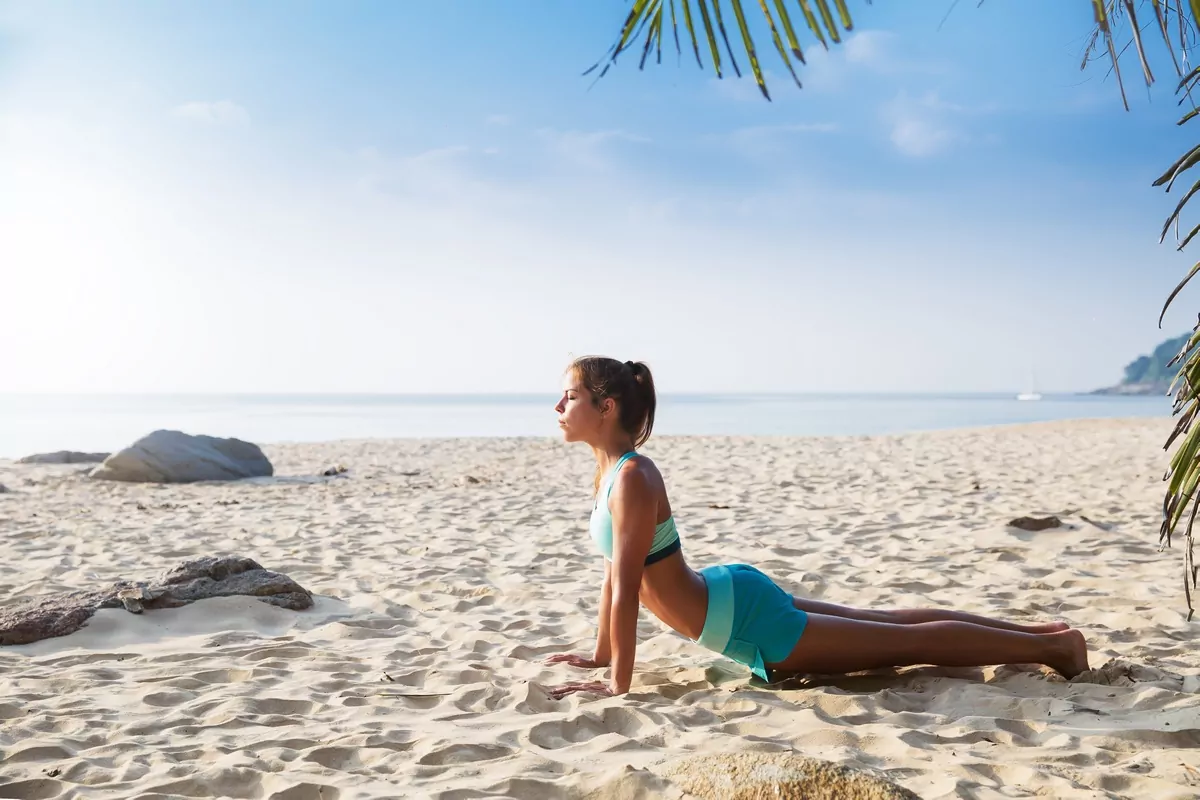
Do not let it tip back and strain the neck. Use the core to keep yourself from swaying the back or falling concave. Some people like stretching the tops of the feet and moving the toes to grip at the mat. Others prefer to keep the feet flexed and resting on the heels. Hold Upward Facing Plank for several cycles of breath. This is one of the best yoga poses to get a flat stomach without exhausting workouts.
9 Tripod Headstand Pose (Intermediate)
If you are looking to rev up your yoga practice while toning your belly, Tripod’s a great place to start. From an all-fours position, place your arms in their Yoga Plank pose position (elbows pointing back towards your toes). Position the crown of the head slightly farther ahead of your arms for a broad base of support.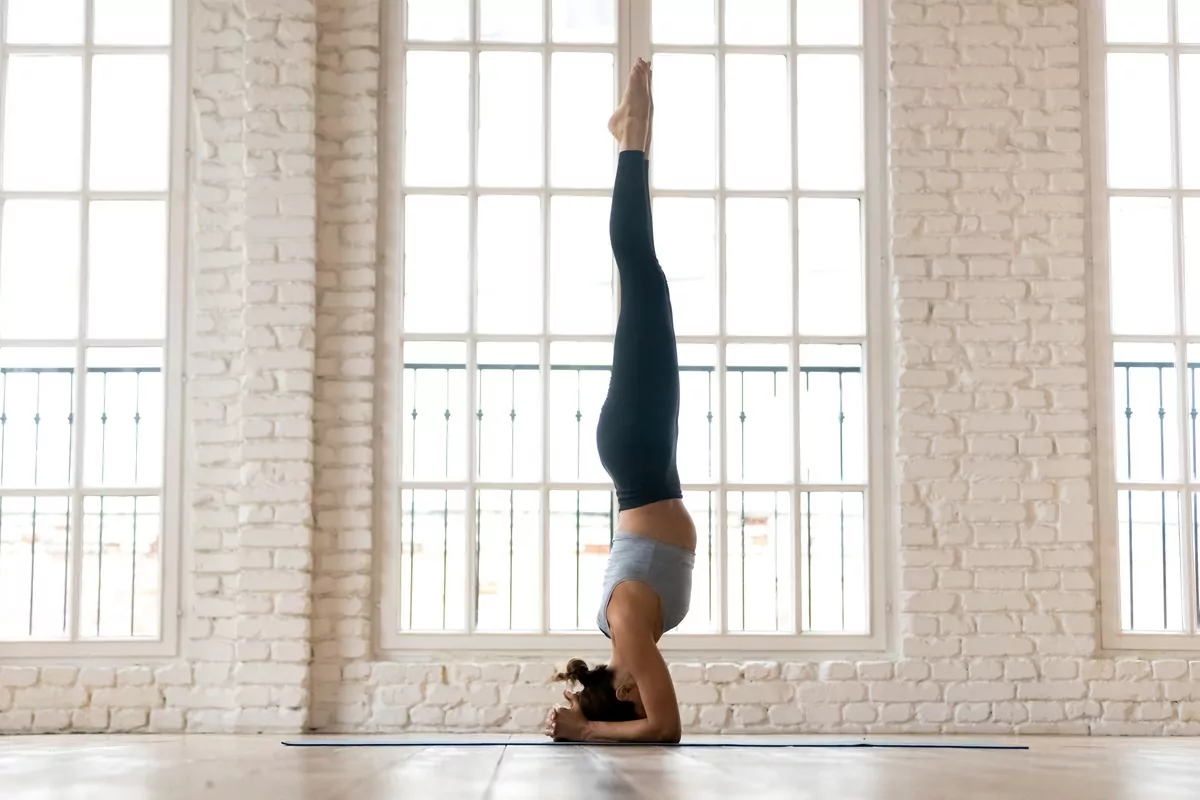
From there, come into something of an inverted V/quasi Down Dog to bring the hips over the head. You can walk or hop the legs up onto arms. Invigorate the core, lift the pelvic floor, and feel a connection of the head, spine, and tailbone. Exit Tripod by reversing the way you entered. Rest in Child’s Pose for a moment before retrying.
Try not to put the elbows in direct contact with the knees when in Tripod (and also for Crow Pose), as this creates miniscule wobbles in the joints that could cause tiny tears, which we do not want.
10 Windshield Wiper Pose with Twist
End your abdominal workout here. Windshield Wiper’s benefits are many when laying stationary on the floor, knees tucked into your chest. However, it can also become great work for the abs.
Laying on the floor in pelvic neutral, lift the legs so the thighs of perpendicular to your torso. Knees should be bent at a 90-degree angle so that the calves are parallel with the floor. For added support, you can place a yoga block or Pilates ball between the knees instead of grinding them together.
From there, begin to shift the knees over to the right, using the core to control the speed. Go slow, and when you reach the extent of the twist, do not lower the legs all the way down to the floor. Breath back to neutral then repeat on the opposite side. Do this windshield wiper motion 12-15 times. Make it tougher by extending the legs straight up.
Read also – 10 Healthy Foods for Flat Abs
There you have it – ten yoga poses that guarantee flatter stomach. Not only are you working to fix your posture, you are allowing the body to strengthen and stretch simultaneously. Yoga is miraculous when it comes to engaging your mental and physical prowess from head to toe. Remember to breathe through the effort, and welcome the yogic joy that comes from these postures. Namaste.

